Adding an element
Add a text, images, cards or any other element to a page: the content area, the Insert element dialog and why some elements are greyed out.
New content goes onto a page as an element: you choose the place, pick the kind of element and fill in its form. This page explains the content area of a page, the Insert element dialog and why some elements cannot be placed everywhere.
The content area
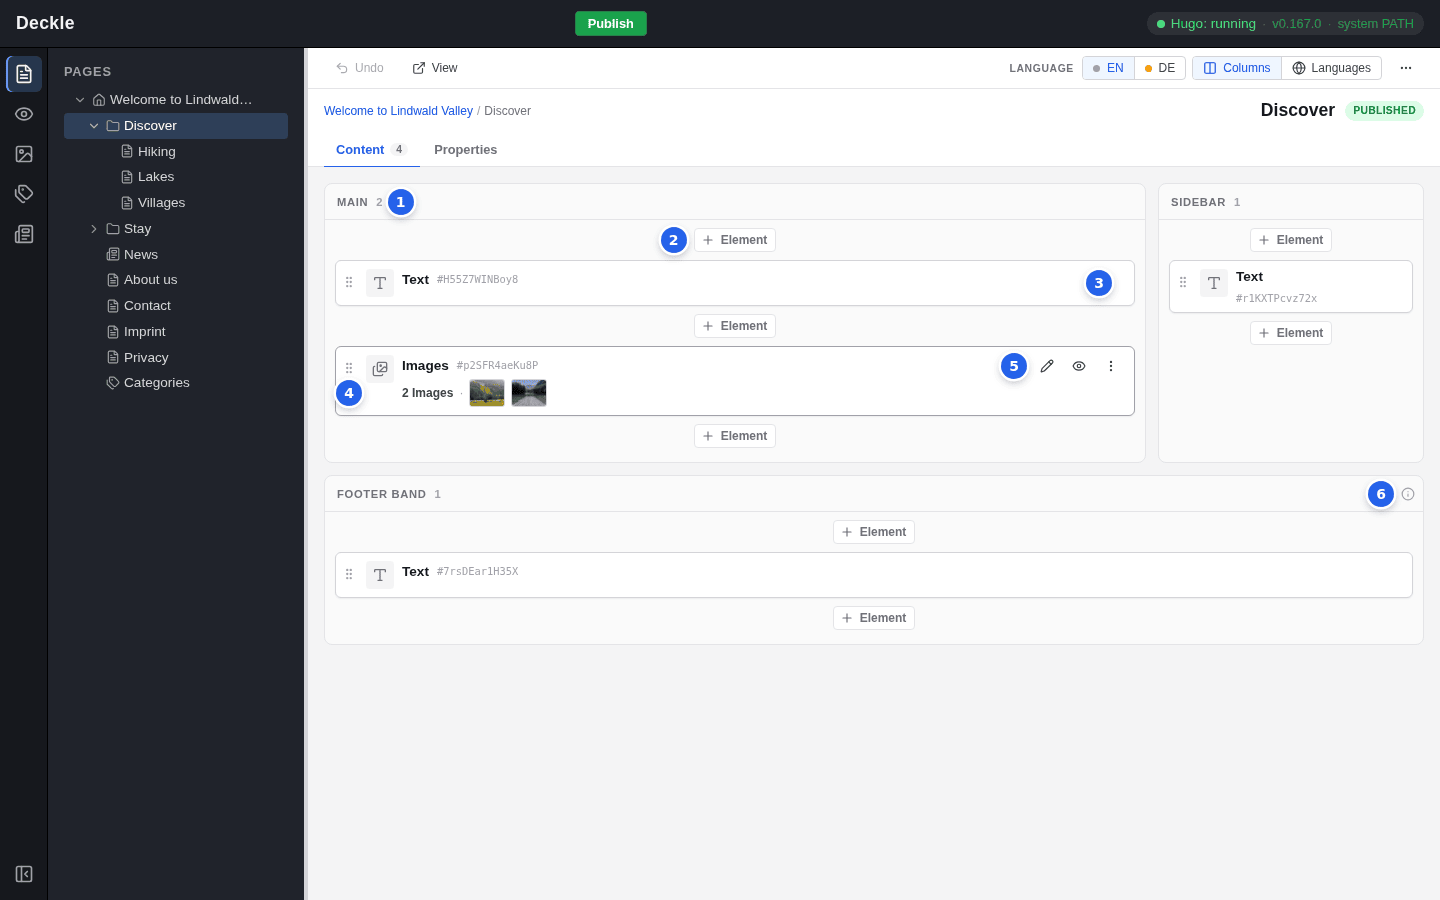
Select a page in the page tree of the Page module: its elements are listed on the Content tab. The number next to the tab counts the element cards; the elements inside another element, such as the items of an accordion, are not counted separately.
- Area. Each area of the page’s layout is a column with its own heading, for example Main, Sidebar or Footer band, and the number of elements in it. Many pages have only one area. See Layouts and columns.
- + Element. There is one above the first element and one after every element. Each inserts the new element at its own position.
- Element card. One card per element: its icon, its name and its anchor, and below that a one-line summary when the element has a heading or a similar short text. An element that holds images, cards or other elements says how many and shows the first three: small pictures of the images, or the headings and questions, with “+1” and so on for the rest. Click the card to open the element’s form.
- Grip. Drag a card by its grip to move it, see Moving, copying and deleting.
- Card buttons. When you point at a card, three buttons appear: the pencil opens the form, the eye switches the element off or on, and ⋮ opens a menu with more actions.
- Info icon. The area accepts only some elements. Point at the icon to see which.
Insert an element
Open the page
Click Page in the module bar on the left and select the page in the page tree. Its Content tab opens.
Click + Element at the right place
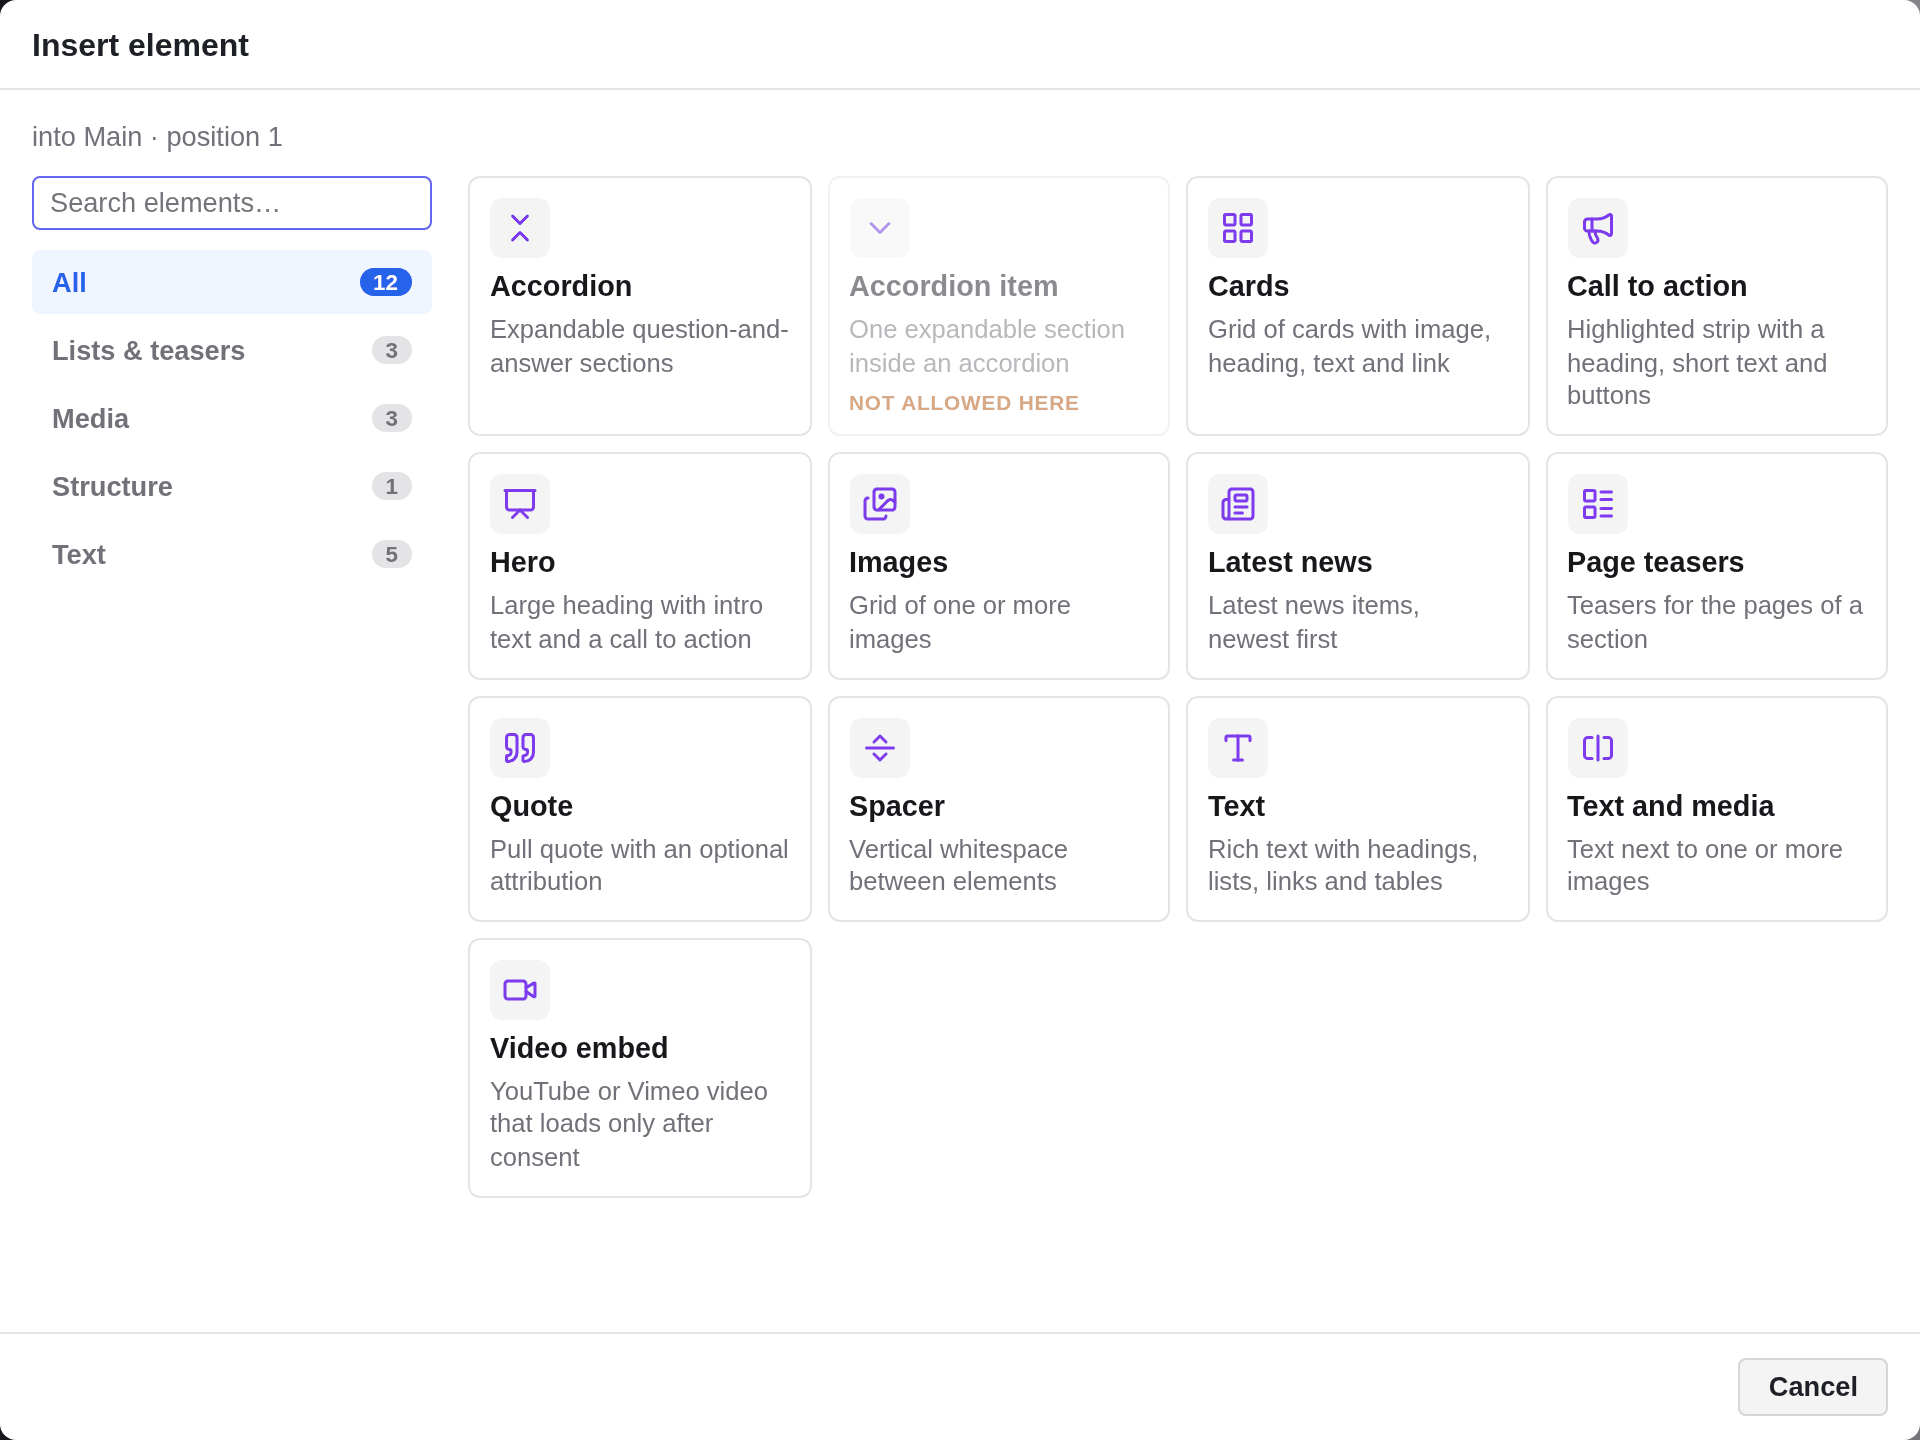
Use the + Element above the card the new element should come before, or below the card it should follow. The Insert element dialog opens and names the place, for example “into Main · position 1”.
Choose the element
Click a tile. To find an element quickly, type part of its name or description into the search box, or pick a category on the left (All shows every element). Pressing Enter in the search box inserts the first element that matches.
Fill in the form and save
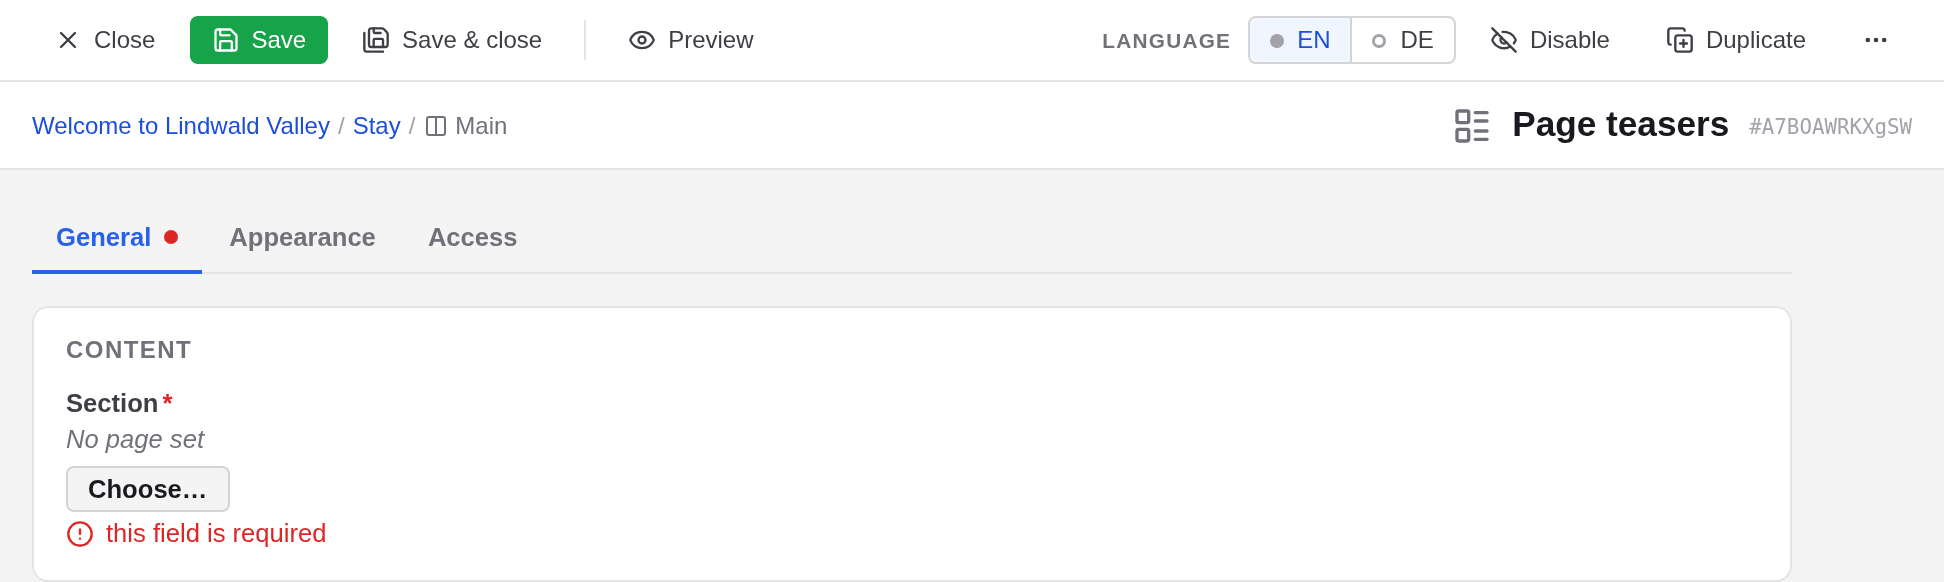
The element is created straight away and its form opens. Fields with a red star are required, so a new element may show “this field is required” at first. Fill in the fields and click Save & close. How the form works is explained in Editing an element.
Why some elements are greyed out
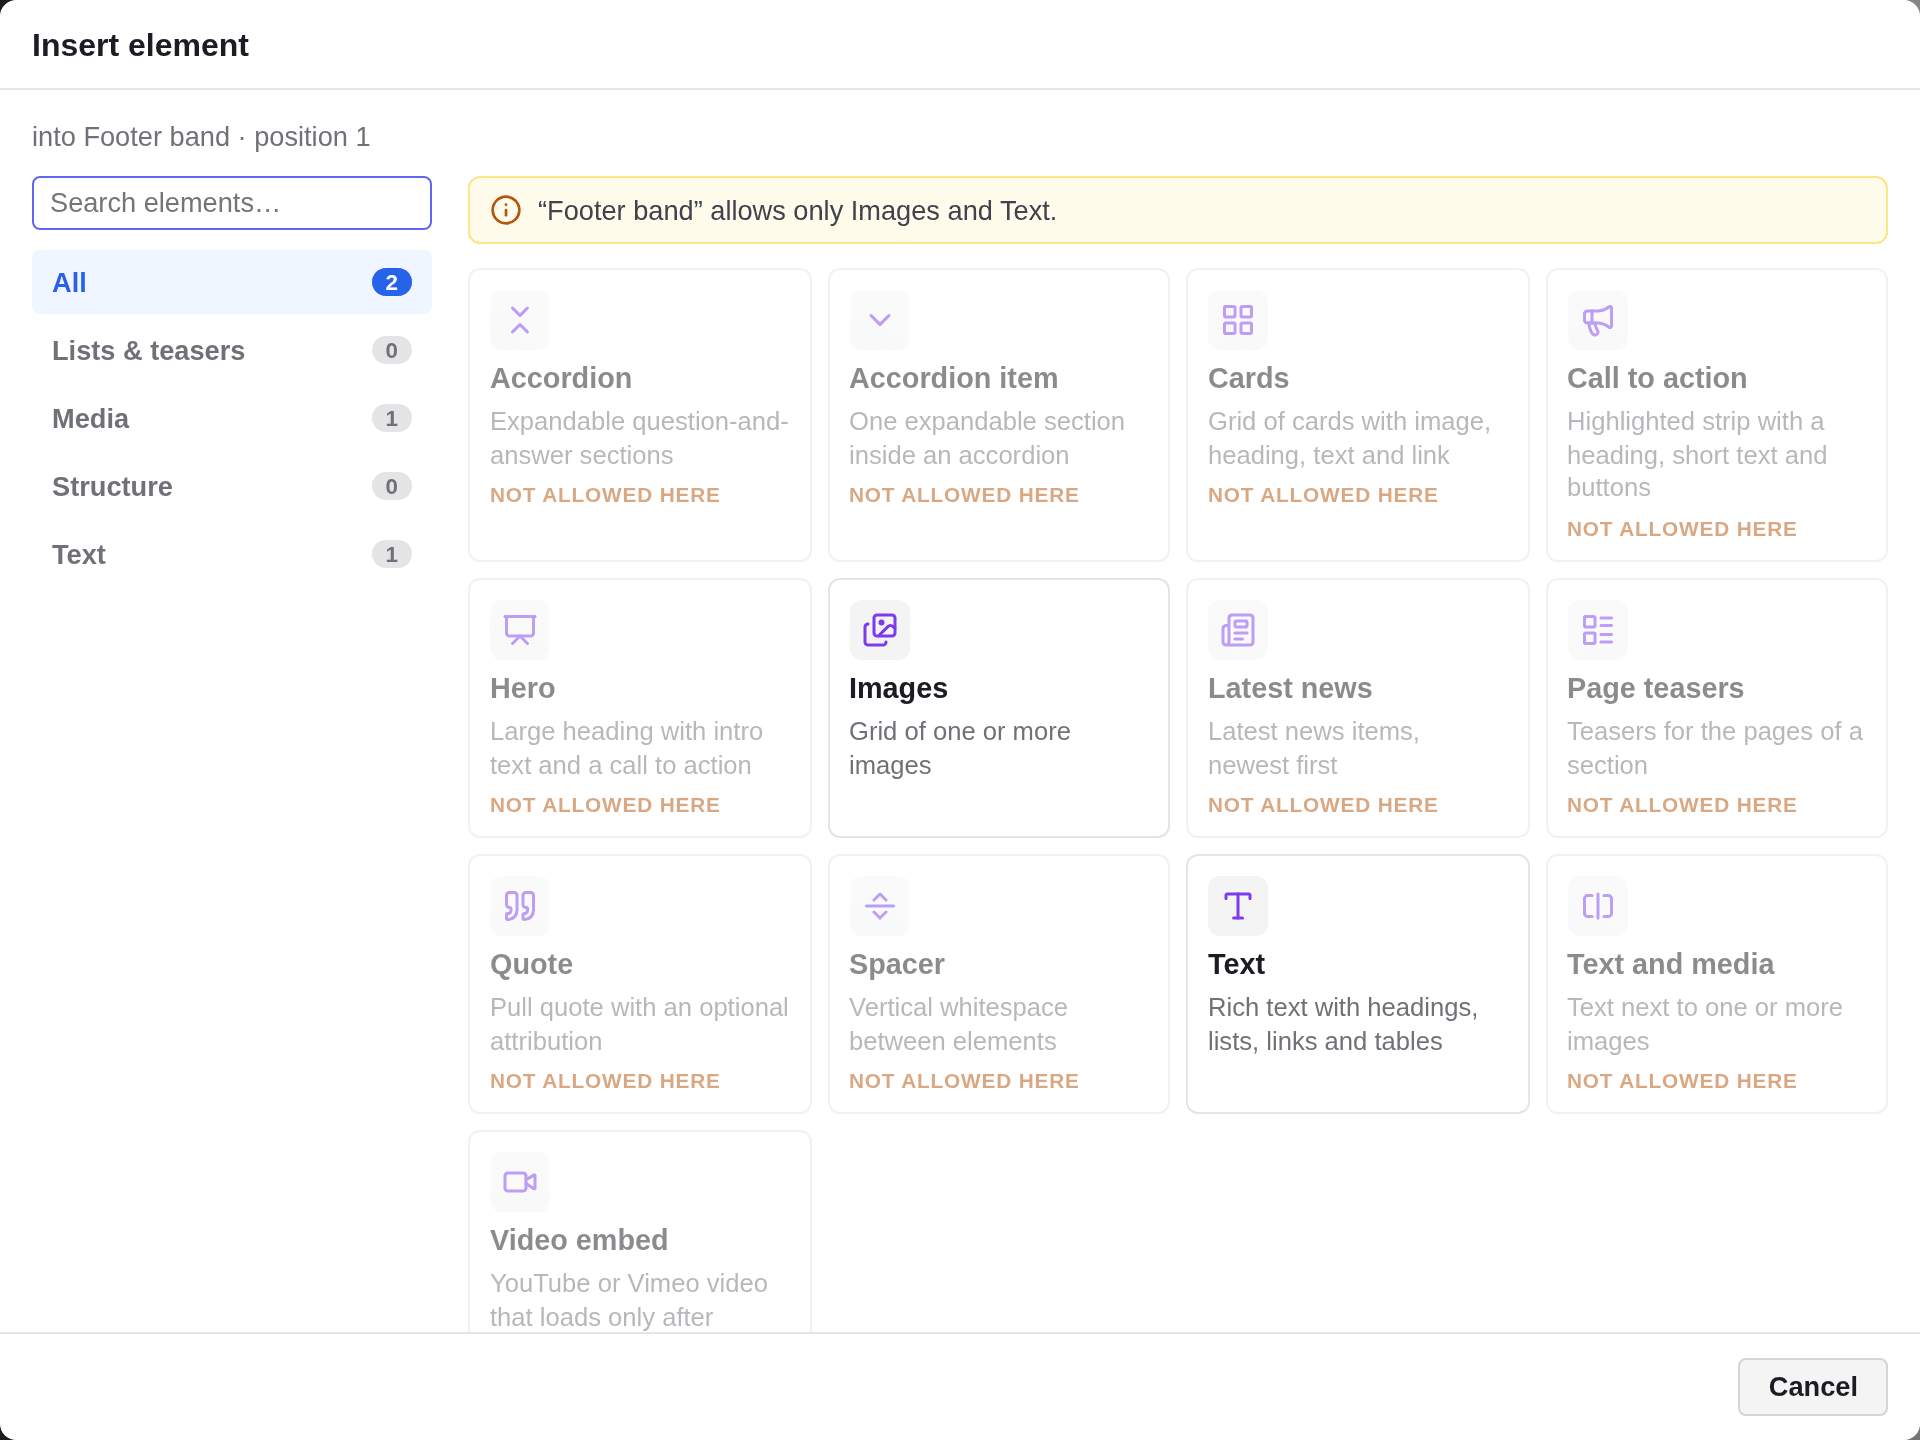
The dialog always lists every element, but the ones that cannot go at this place are greyed out and marked Not allowed here. Point at a greyed-out tile to see the reason. The most common ones:
- The element only works inside another element. An Accordion item, for example, can only be placed inside an Accordion (“Only allowed inside Accordion”).
- The element only works on its own, not inside another element (“Only allowed at the top level”).
- The area accepts only certain elements. The dialog then says so above the tiles, for example that the Footer band allows only Images and Text.
- The kind of page does not allow the element.
Some elements never appear in the dialog: buttons and icons are placed inside a text (see Rich text and links), and single images or cards are rows that you add in the form of their element. Which elements may go where is part of your site’s setup. If you need an element in a place where it is not allowed, ask the person who looks after your website.
Elements inside other elements
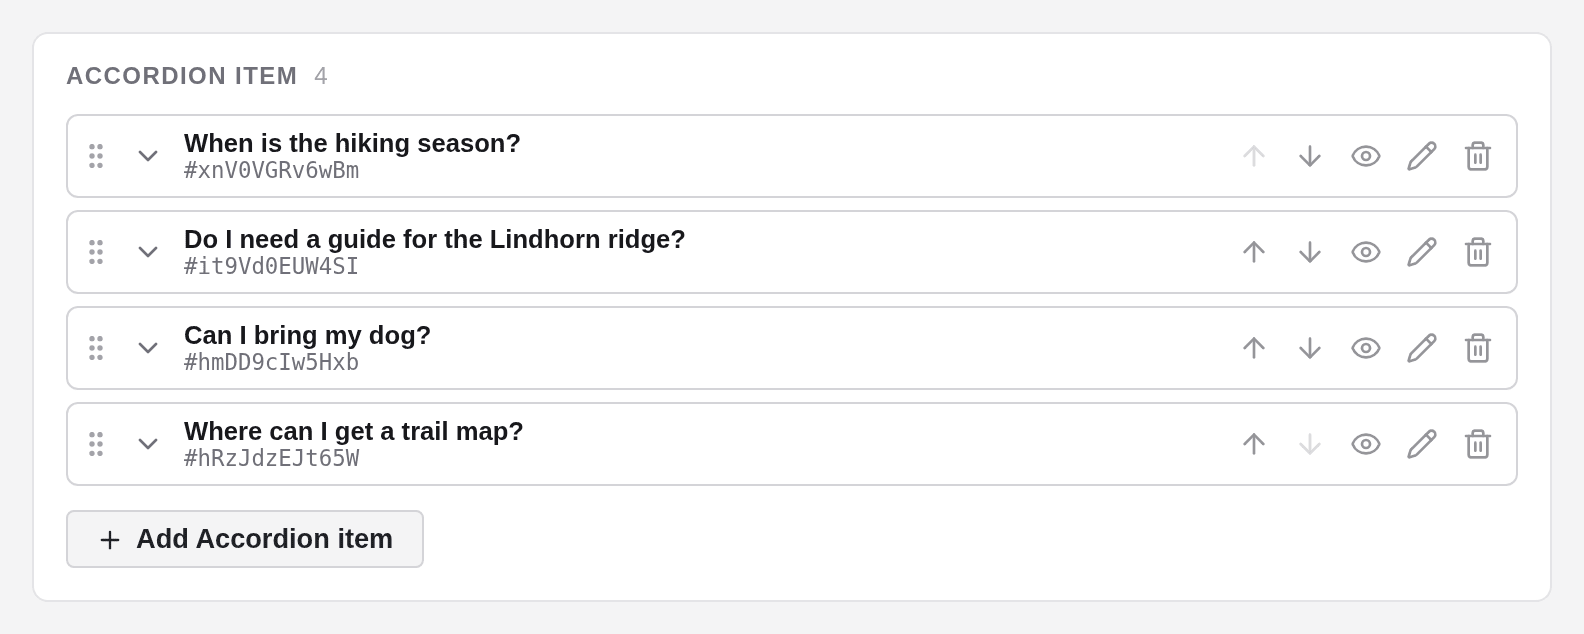
Some elements hold other elements. An Accordion, for example, holds the Accordion items that visitors open and close. On the Content tab the Accordion is a single card that says how many items it holds, such as 4 × Accordion item, followed by the first questions. You manage the items in the Accordion’s form, on its General tab:
- Add Accordion item opens the insert dialog, which offers only what fits inside. The new item is added at the end and its form opens; Save & close brings you back to the Accordion’s form.
- The pencil of a row opens that item’s form.
- The arrows or the grip change the order, the eye switches an item off or on, and the bin removes it. These three changes are made when you save the Accordion’s form; until then, Discard changes takes them back.
To move an element into such an element from elsewhere, cut or copy it, then choose Paste inside in the ⋮ menu of the Accordion’s card (see Moving, copying and deleting).
Paste instead of insert
If you have cut or copied an element, a Paste button appears next to every + Element where that element is allowed. Click it to place the element there. See Moving, copying and deleting.